Conversion of Athearn PS-2 2893 cu. ft. Hopper
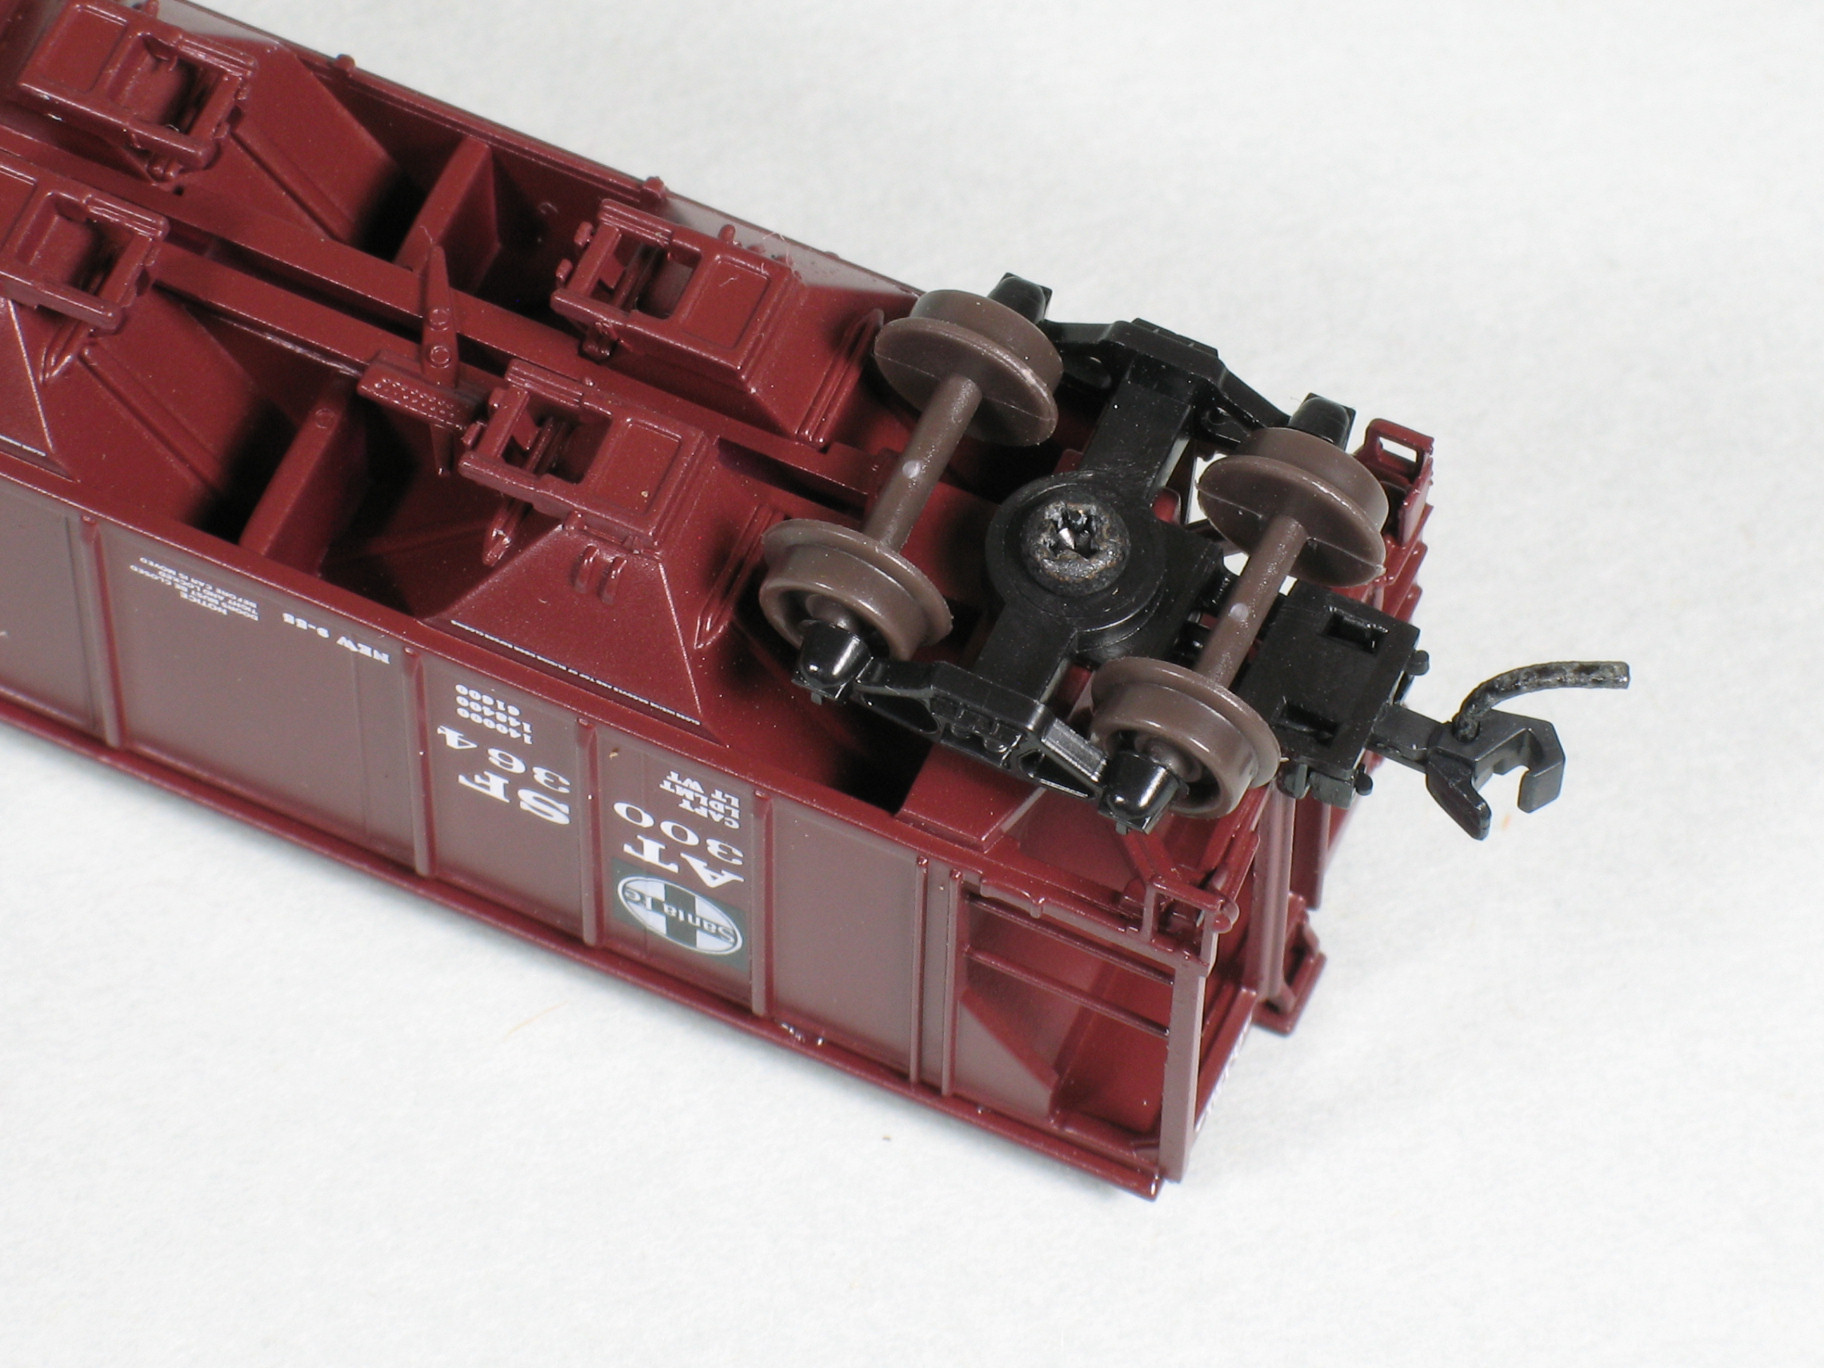
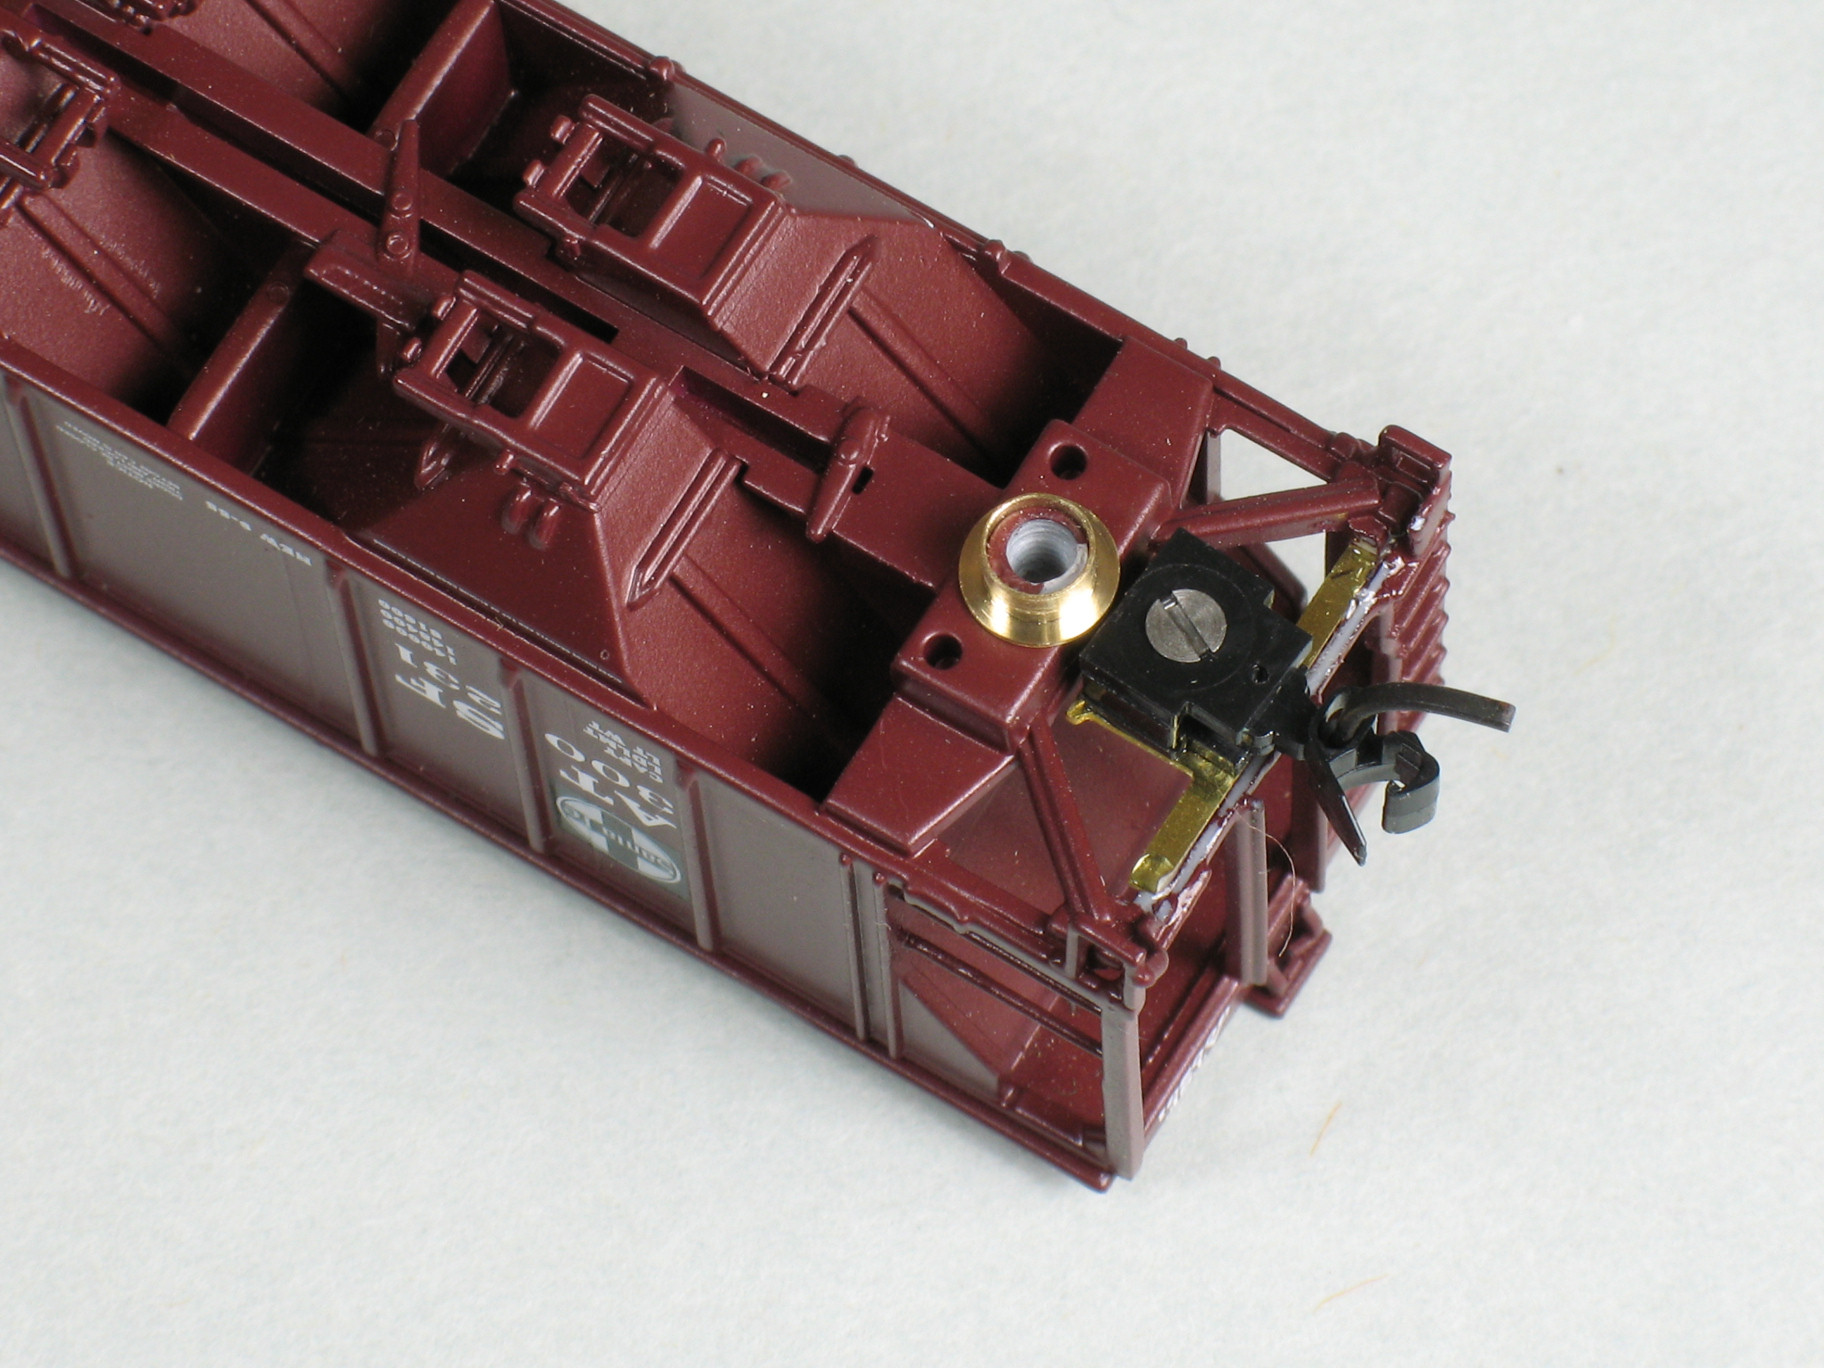
I bought a trio of these cars decorated for the Santa Fe, and of course I wanted to convert them to body-mounted couplers. As usual, I have used the Micro-Trains #1015 couplers, but how was I to fix them to the plastic car underframe? As you can see from photo 2 there is not much material at the ends.
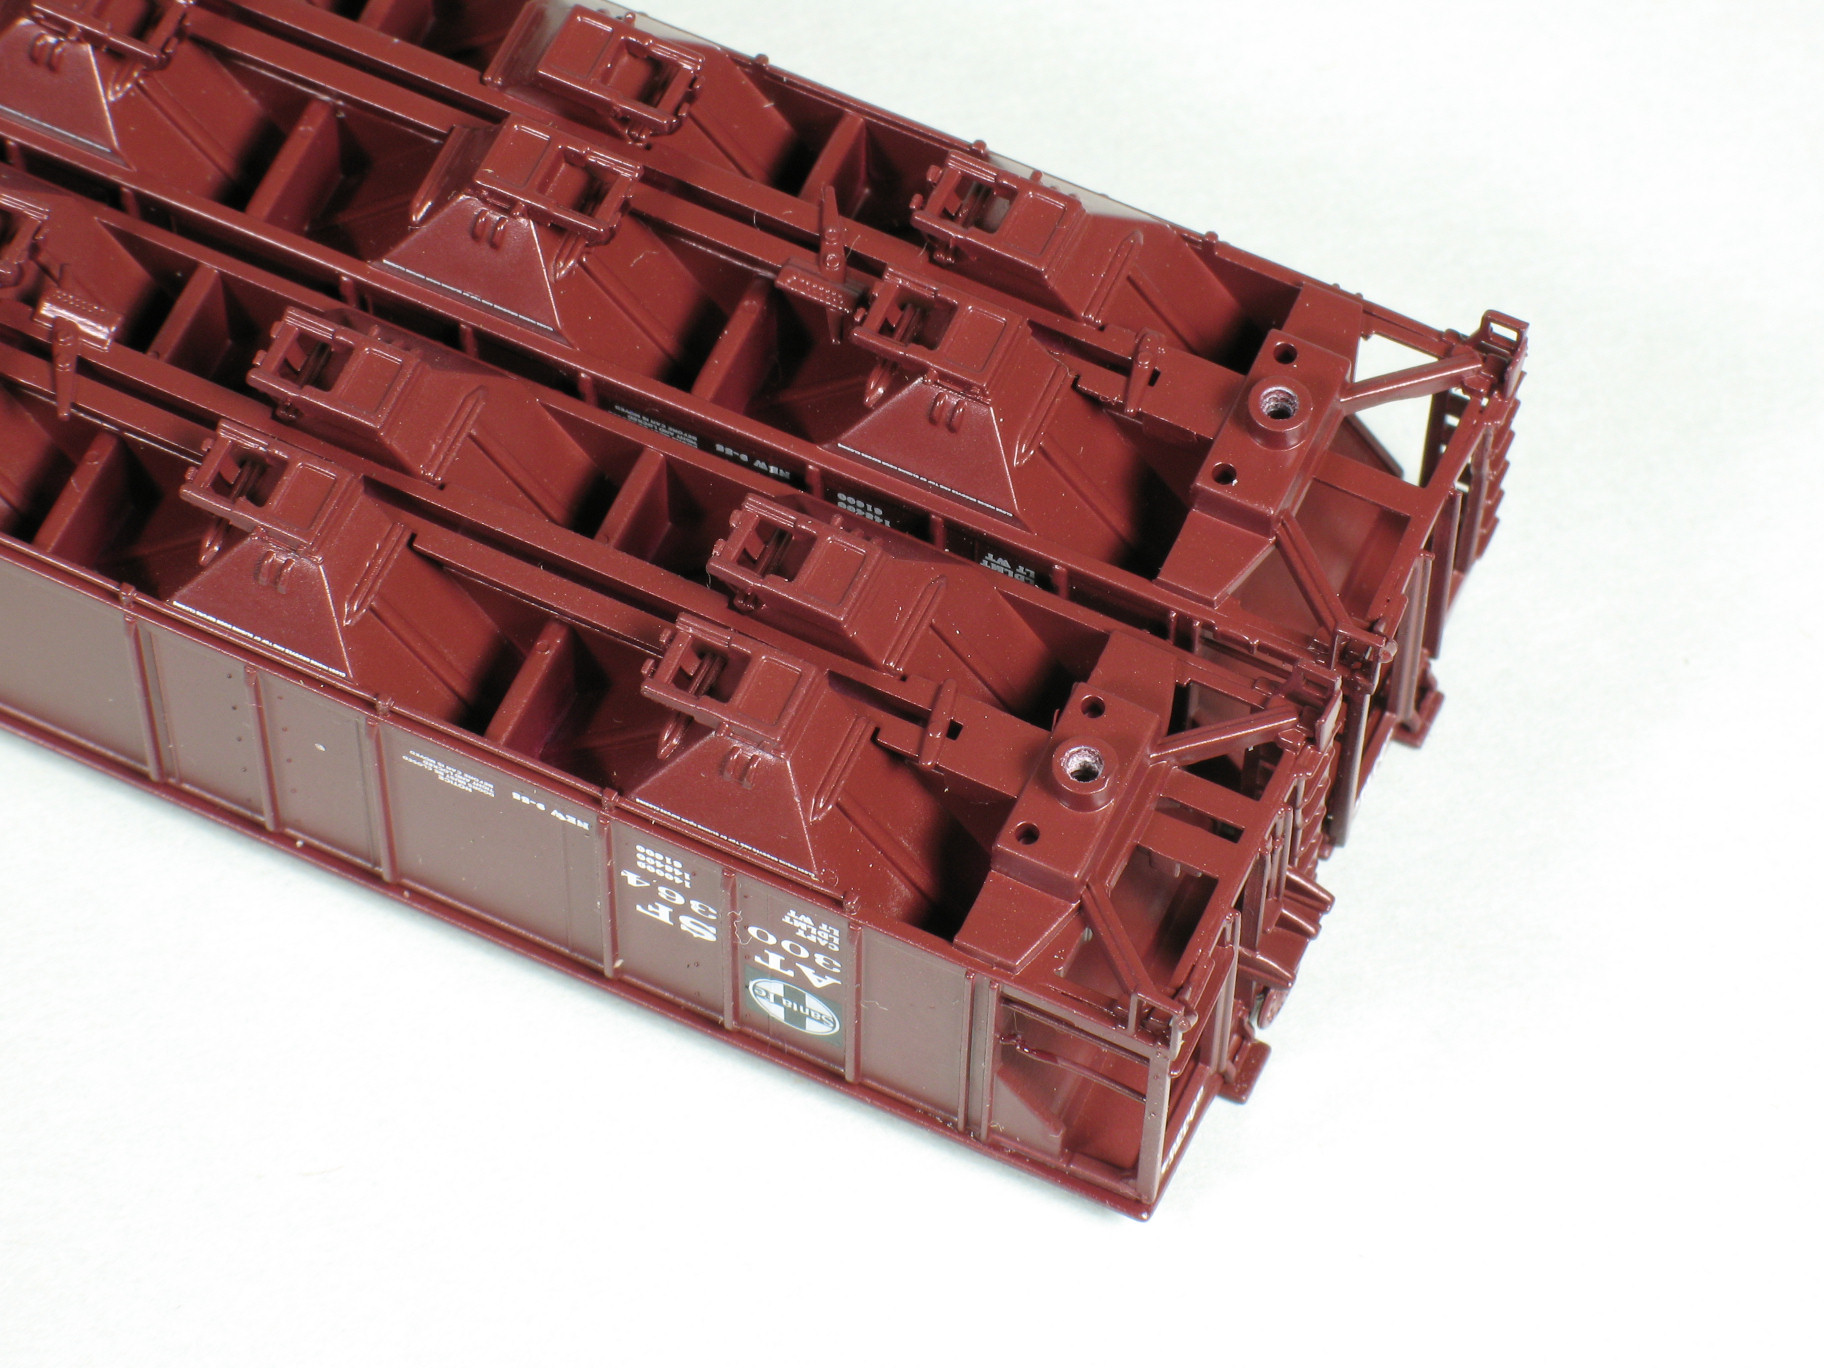
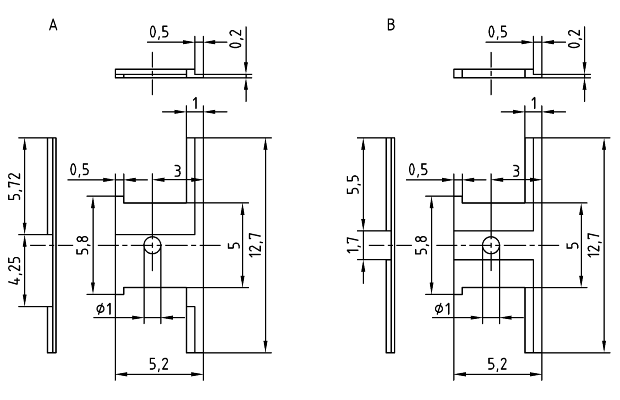
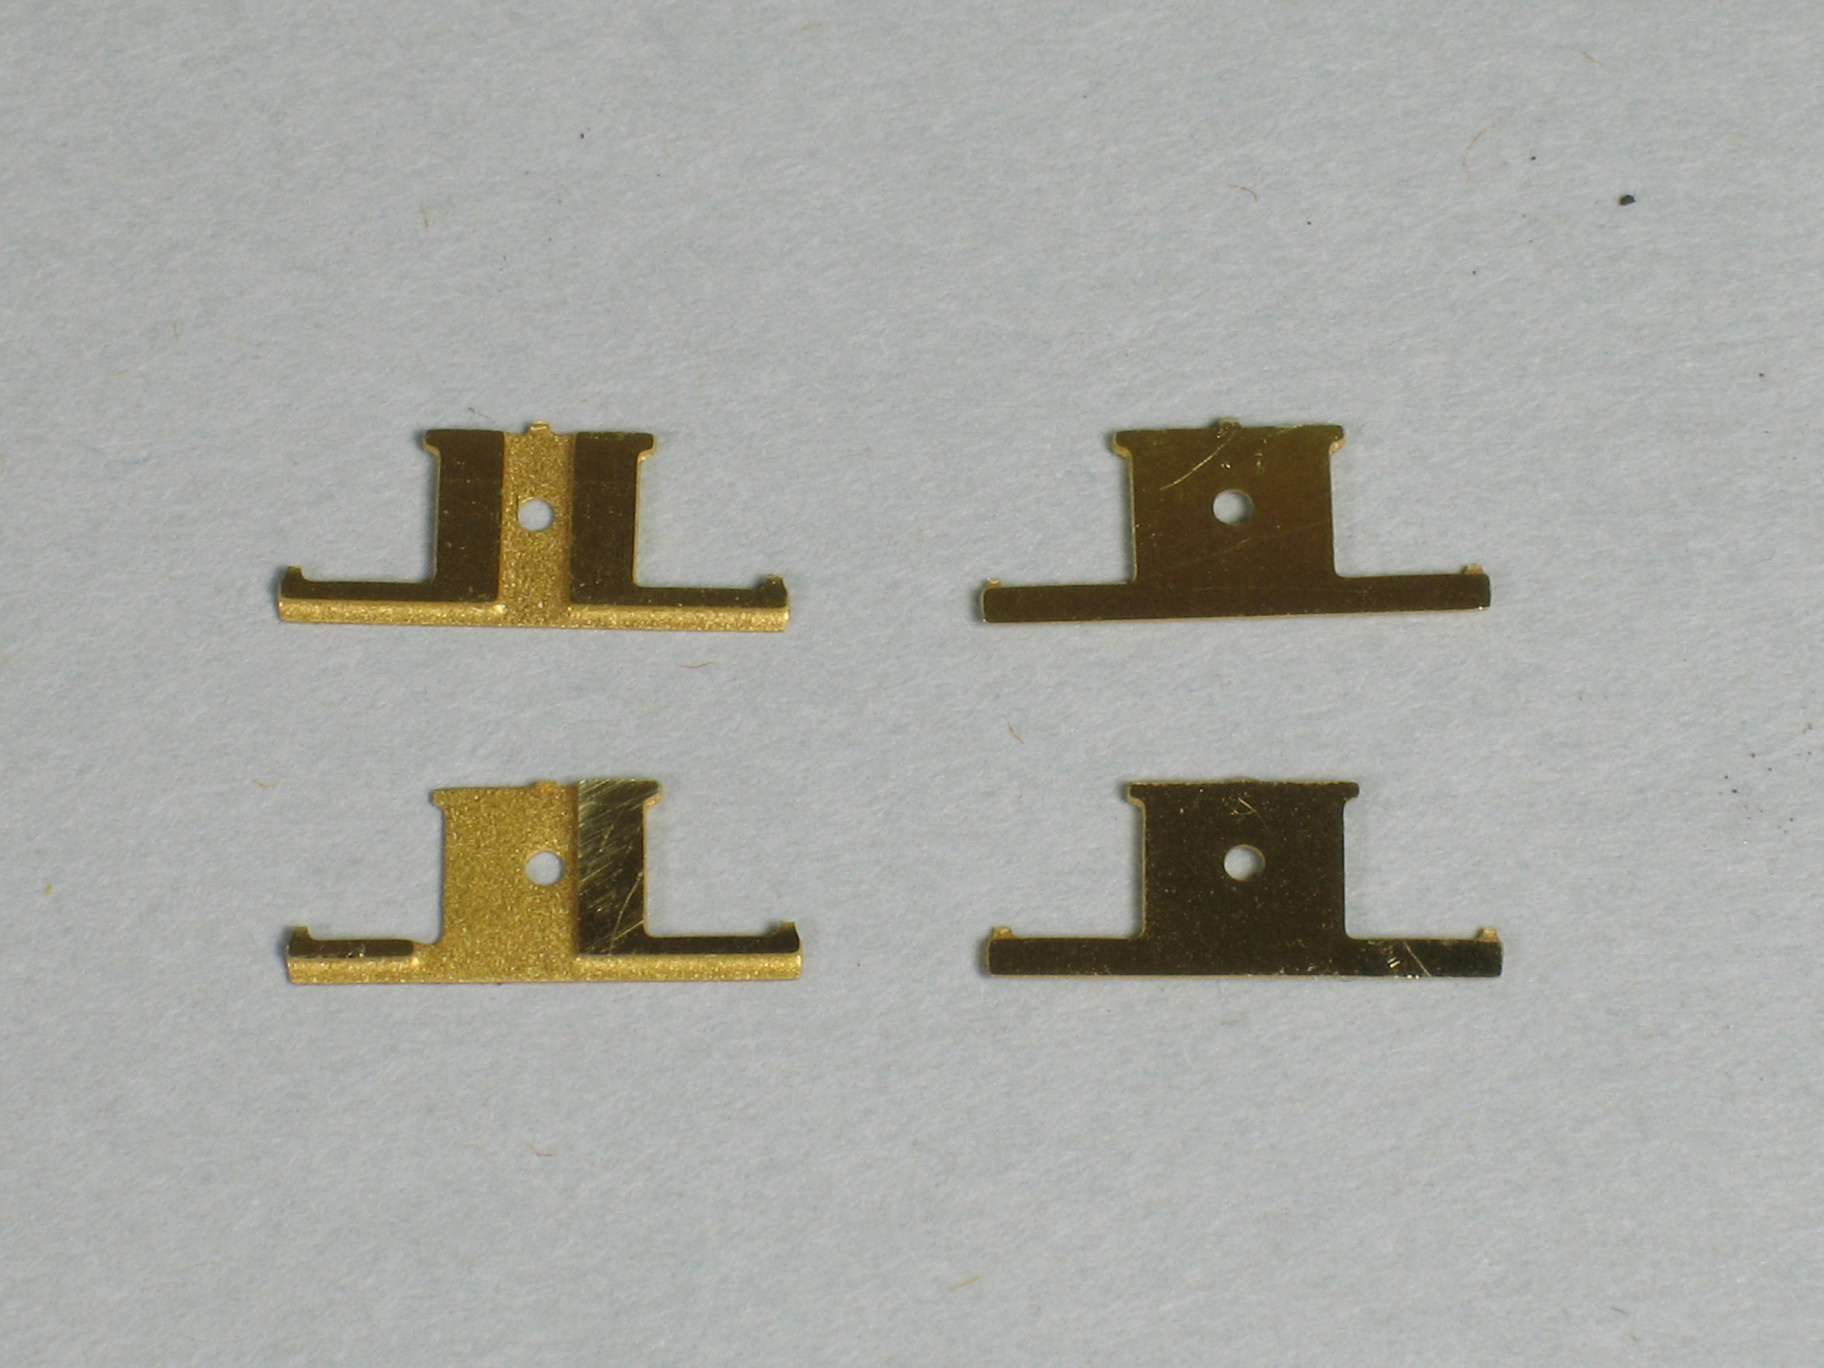
I obviously had to make some brass plates to fit and as I at that time was designing some etched coupler fixing plates for a friend, I fitted these into the etching drawing. The plate thickness is 0.5 mm so I had to half-etch parts of the plates to make them thin enough.
After preparing the underframe ends by scraping away the paint on surfaces to be glued and removing a little excess plastic near the body bolster at the A end, I glued the plates on with epoxy. Now came the time to check the height of the car. I had cut off the couplers on one set of Athearn trucks and fitted them; the car height seemed about right.
I drilled 1mm holes through the pre-etched holes in the coupler fixing plates into the plastic underframe and cut them using a M1.2 tap. The assembled #1015 couplers were screwed on using M1.2x4mm countersunk screws which I prefer to Micro-Trains standard screws, and a little epoxy to prevent the coupler boxes from turning.
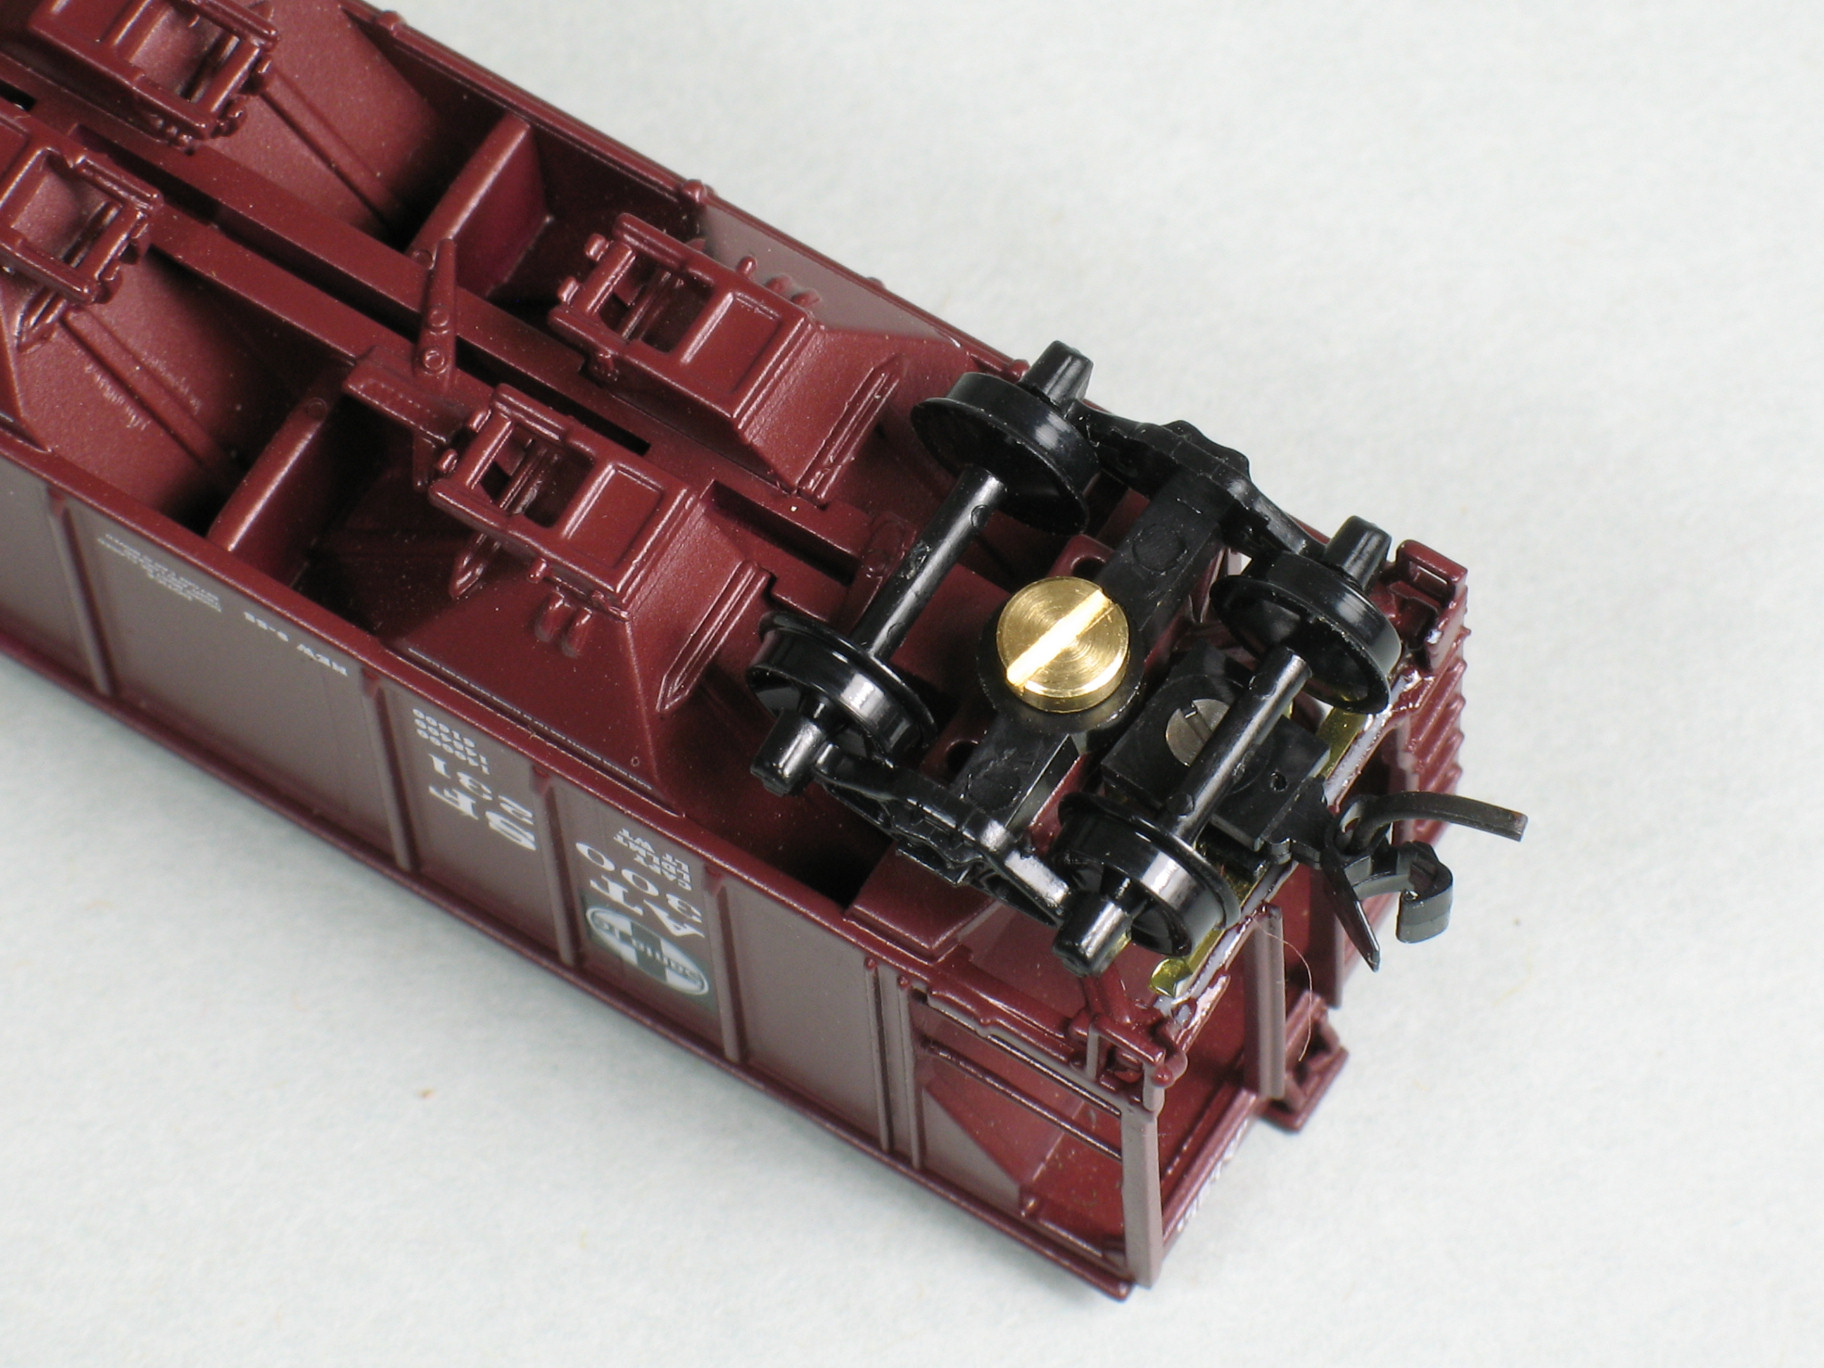
After fixing the couplers there was, however, not enough distance between the coupler boxes and the bolster pins for the rather bulky Athearn trucks to fit. I had thought about fitting Micro-Trains trucks on the cars, and a quit test showed that Micro-Trains Bettendorf trucks would almost fit. They just had to be shimmed a little and the bolster pin was too thin, but I turned some small brass bushings to take care of that.
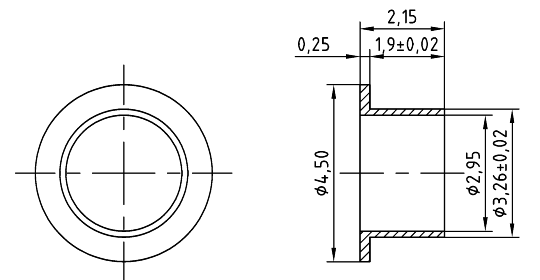
The head diameter of original Athearn bolster screws is too small to keep the Micro-Trains trucks securely in place, so I drilled the pin centre hole 1.6mm, cut M2 thread with a tap and substituted M2x3mm cylindrical head brass screws which have a 3.6mm head diameter. I could have added a washer to the original screw but I prefer to use as few parts for fixing as possible.
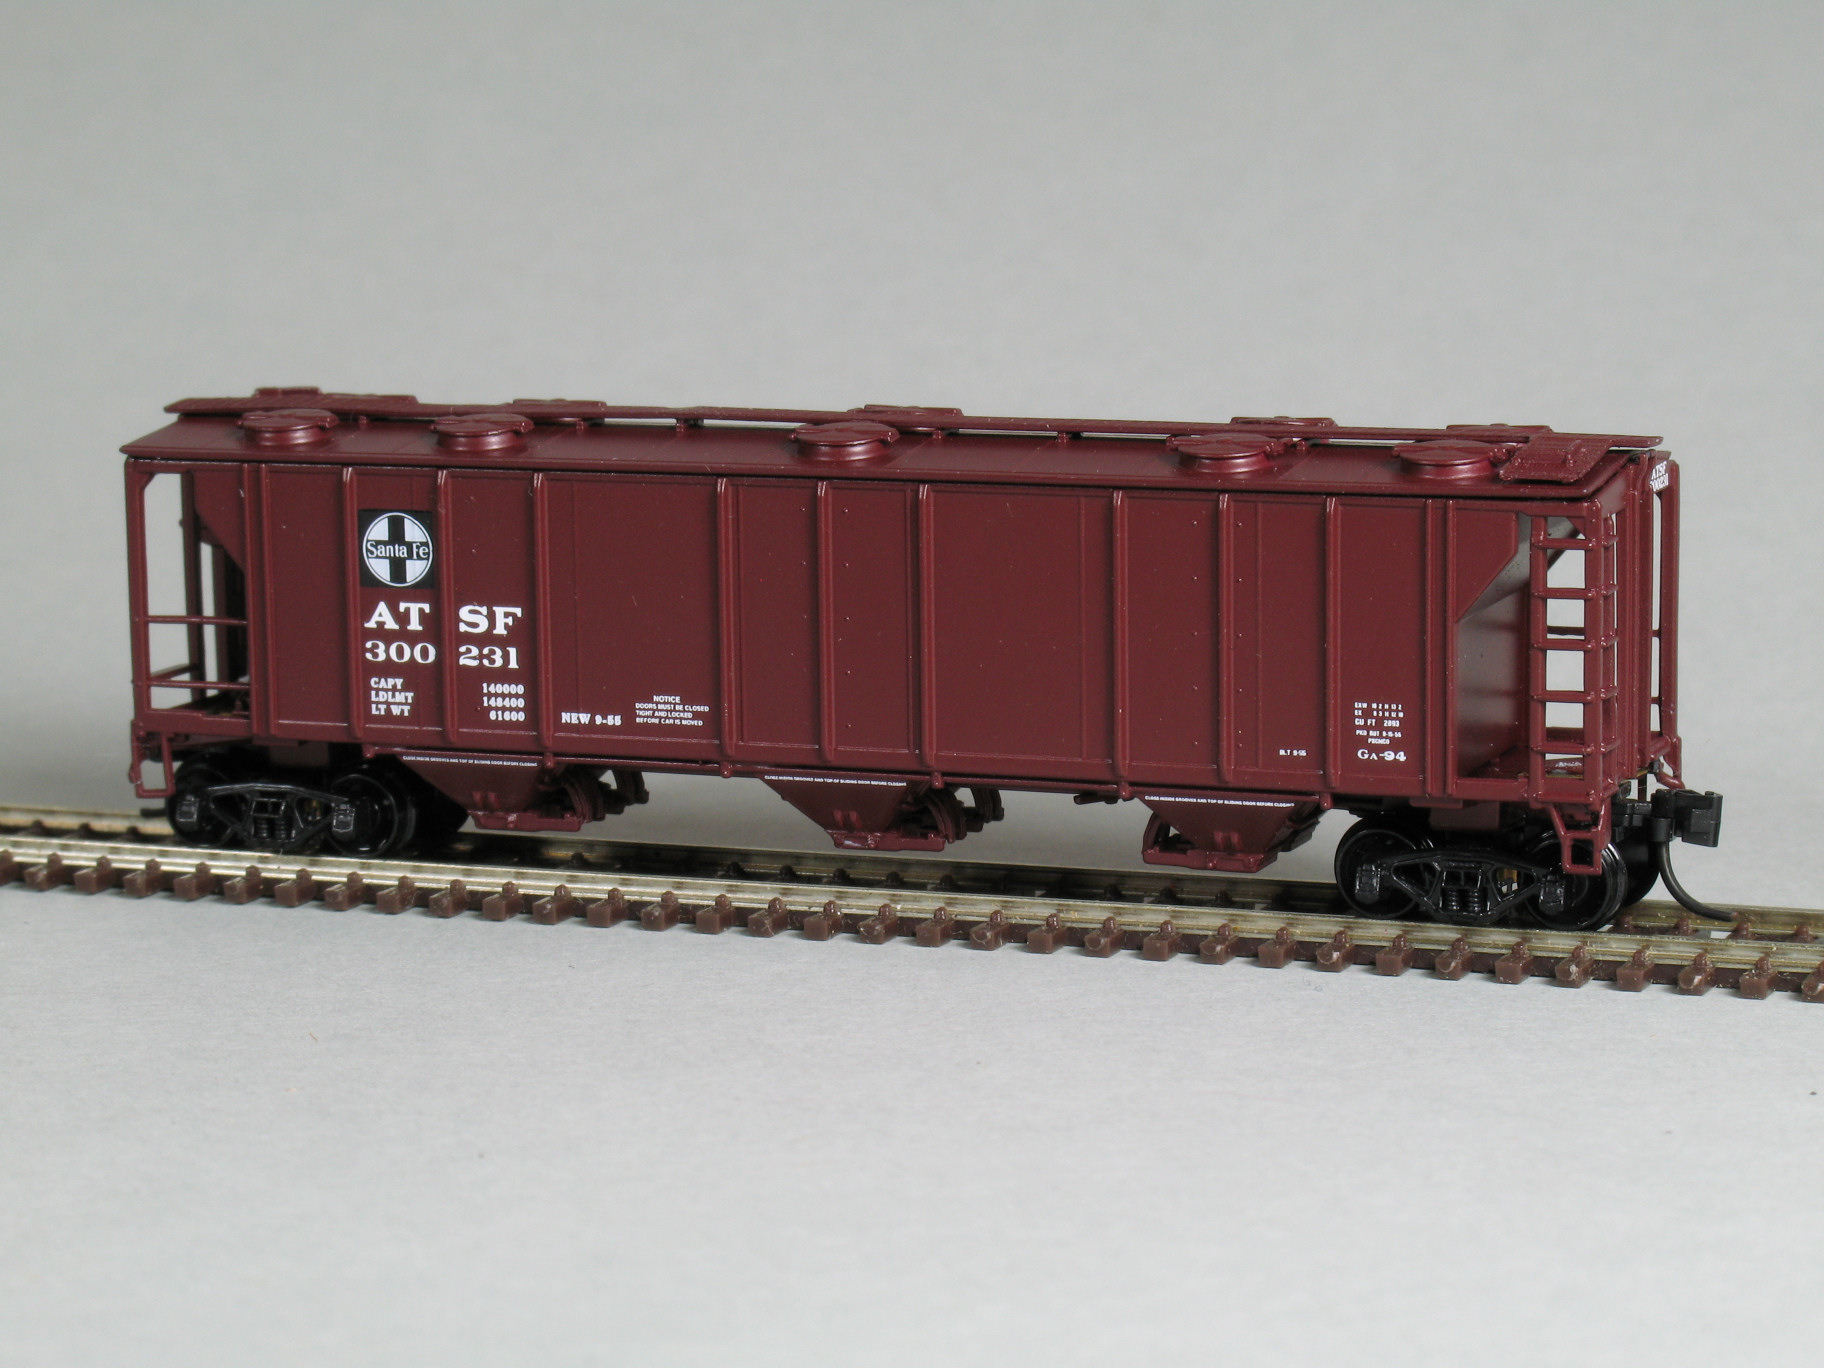
Now only new wheel sets, a little paint touchup and weathering is needed. I have planned to substitute Fox Valley Models wheel sets, but they have not yet arrived.